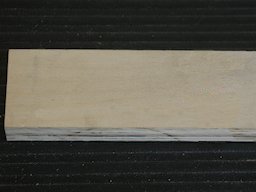
- I used 1/2 inch birch plywood for the miter gauge extension because I had some laying around. The actual material is not especially important; just so it provides a rigid and stable surface to attach the pieces to be cut.
The extension illustrated is two inches high by 12 inches long.
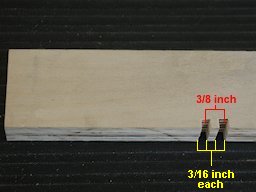
- You are making two slots in the extension, with one solid space between them. For the box joints to be usable, the two slots and the space must all be exactly the same width.
- Doubling the width of the dado gives the center-to-center distance for adjacent dadoes. In other words, as the dadoes are 3/16 inch wide, from the center of the first dado in the jig to the center of the second is 3/8 inch.
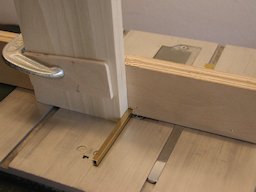
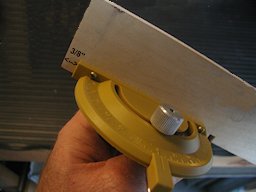
- The easiest and most accurate way I found to ensure correct spacing was to place the extension (the two inch wide birch piece) against the miter so that their edges line up. Hold it in place securely and cut the first slot. Then, slide the extension along the face of the miter so that it protrudes 3/8 inch beyond the edge of the miter and cut the second slot [see the next photo, Step 3]. In practice, I found it was possible to hold the extension in place against the miter by hand, but if you have a suitable small clamp, that would be more secure. The slots should now be 3/16 inch wide and have a 3/16 wide space between them.
- It is secured to the miter with two #4 x 7/8 round head brass wood screws. This diameter screw comfortably fit the existing holes in the Proxxon miter.
- I pre-drilled using a 1/16 inch diameter bit in the Proxxon Drill Press.
- The key is critical to achieving the precision necessary for successful box joints. The instructions tell you to cut a key in the exact same size as the dadoes and make it easy to replace as it becomes worn. At 3/16 inch, a wood key would be difficult to cut, very difficult to attach to the extension and not likely to survive in use for very long.
- It's easier to buy some stock material in the correct dimension and use that for the key. I went to a local model railroading store and, after considering plastic and wood, decided on 3/16 inch square brass.
- The key doesn't need to be very long; just enough to be convenient to work with. A couple inches is adequate.
- The key is placed in the first slot cut in the extension (Step 2, above). In operation, this will be the slot closest to the miter gauge and farthest from the blade.
- In practice, there was no need to fasten the brass key in the slot. In the 1/2 inch birch, the key fit snugly enough that it was held in place by friction alone. Being brass, there are no concerns about breakage or wear.